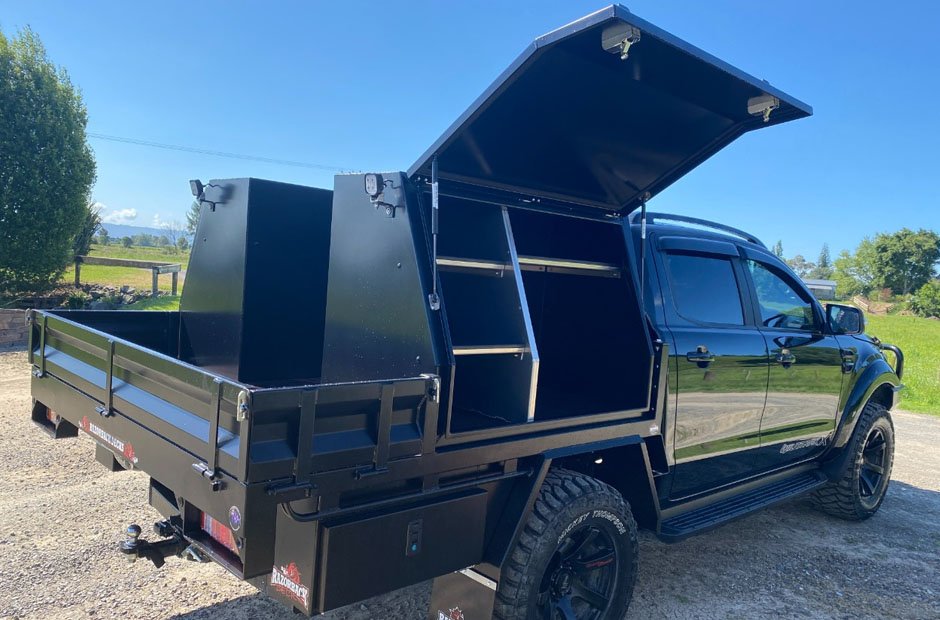
Utility vehicles or ‘utes’ are a common sight on roads across Australia, valued for their versatility and reliability. Utes are often used by tradespeople and adventurers alike to transport tools, equipment, and supplies. One critical accessory for maximising the functionality of a ute is a robust tool box. Ute tool boxes come in various shapes, sizes, and materials to cater to diverse needs and preferences. This article serves as a guide to fitting and mounting tool boxes on your utility vehicle.
Understanding the Basics of Ute Tool Box Fitment
Before diving into the actual fitment process, it’s important to comprehend the basics. The right fitment not only ensures the secure placement of your tools but also contributes to the safety and aesthetics of your vehicle. It is essential to consider the dimensions of your ute’s tray or bed when selecting a tool box. Compatibility with the vehicle’s design ensures that the tool box can be mounted effectively without hindering the vehicle’s operation or compromising bed space.
Selecting the Right Tool Box
Selection involves more than just measuring dimensions. Consider factors such as material—which could range from aluminium to steel—, the weight capacity, lock systems, and ease of access. Weather resistance is also a crucial factor for durability and protection of the tools inside. Ensure that the tool box you choose aligns with your specific needs, whether it’s for heavy-duty trade work or lighter, general-use applications.
Equipment Needed for Fitment
To fit a ute tool box correctly, you’ll require some basic equipment, such as measuring tape, a drill, appropriate bolts and nuts, and possibly a sealant to prevent water from entering the tool box. It is also advisable to have a helping hand, as positioning and securing the tool box can be a two-person job. Ensuring that you have all the right tools at hand will facilitate a smooth installation process.
Measuring and Positioning Your Tool Box
The critical first step in mounting your tool box is to take accurate measurements of your vehicle’s tray and the tool box itself. Finding the ideal placement for your box will depend on how you wish to utilise the remaining bed space and the locations of the wheel arches. Once you’ve identified the perfect spot, you can proceed to mark the areas where the mounting brackets or bolts will go. Precise positioning is invaluable to avoid movement or rattling of the tool box when the vehicle is in motion.
Securing the Tool Box
With your tool box positioned, it’s time to secure it to the vehicle. This typically involves drilling holes through the base of the box in alignment with the pre-marked spots on the tray. Utilising sturdy bolts and nuts will ensure a tight fit. It’s important to use flat washers to protect the tray’s surface and locking washers to prevent the bolts from loosening over time due to vibrations.
Sealing and Waterproofing
After the tool box is bolted down, it’s crucial to prevent any water ingress that can damage your tools. Applying a high-quality sealant around the join will enhance the longevity of both the tools and the tool box. Some tool boxes come with integrated weatherproofing features; if yours does not, you may want to consider adding rubber seals or additional protective layers.
Regular Maintenance and Inspection
Once the fitting process is complete, ongoing maintenance is key to ensuring the tool box remains securely attached and fully functional. Regular inspections will allow you to catch any signs of wear or loosening early on. This not only guarantees the safety of your tools but also that of other road users.
Common Mounting Challenges
Ute owners may encounter a range of mounting challenges, from limited space to compatibility issues with aftermarket bed liners. Tackling these requires careful planning and, occasionally, innovative solutions such as custom-fitting kits or adjustable mounts to work around unique bed features or auxiliary equipment like bed covers or racks.
Professional Installation Services
For those who are less hands-on or prefer to ensure that their tool boxes are fitted with expert care, seeking professional installation services is an excellent option. Specialists in the field have the know-how and specialised tools to handle varied fitment scenarios, providing peace of mind and saving time for the ute owner.
Final Thoughts
Fitting and mounting a tool box to your ute can dramatically increase your vehicle’s utility and efficiency. By following this guide, you’re well on your way to ensuring that your tools are secured safely and conveniently for access whenever you need them. Remember to take into account not only the immediate fitment but also the long-term maintenance requirements for the best outcome.
Embrace Versatility and Organisation with Ute Tool Boxes
With ute tool boxes, you can maintain an organised and efficient workspace on the move. By selecting the appropriate tool box for your needs, accurately measuring, and properly securing it to your vehicle, you’ll enhance your ute’s value and functionality. Take the time to install your tool box correctly, and it will serve you well through countless job sites and adventures.
The insights provided in this guide are designed to aid in the mounting and fitment process, but they also highlight the importance of precise execution and regular care. Properly fitted tool boxes can mean the difference between a chaotic and a well-coordinated workflow, transforming your ute into a well-oiled machine equipped for any challenge.